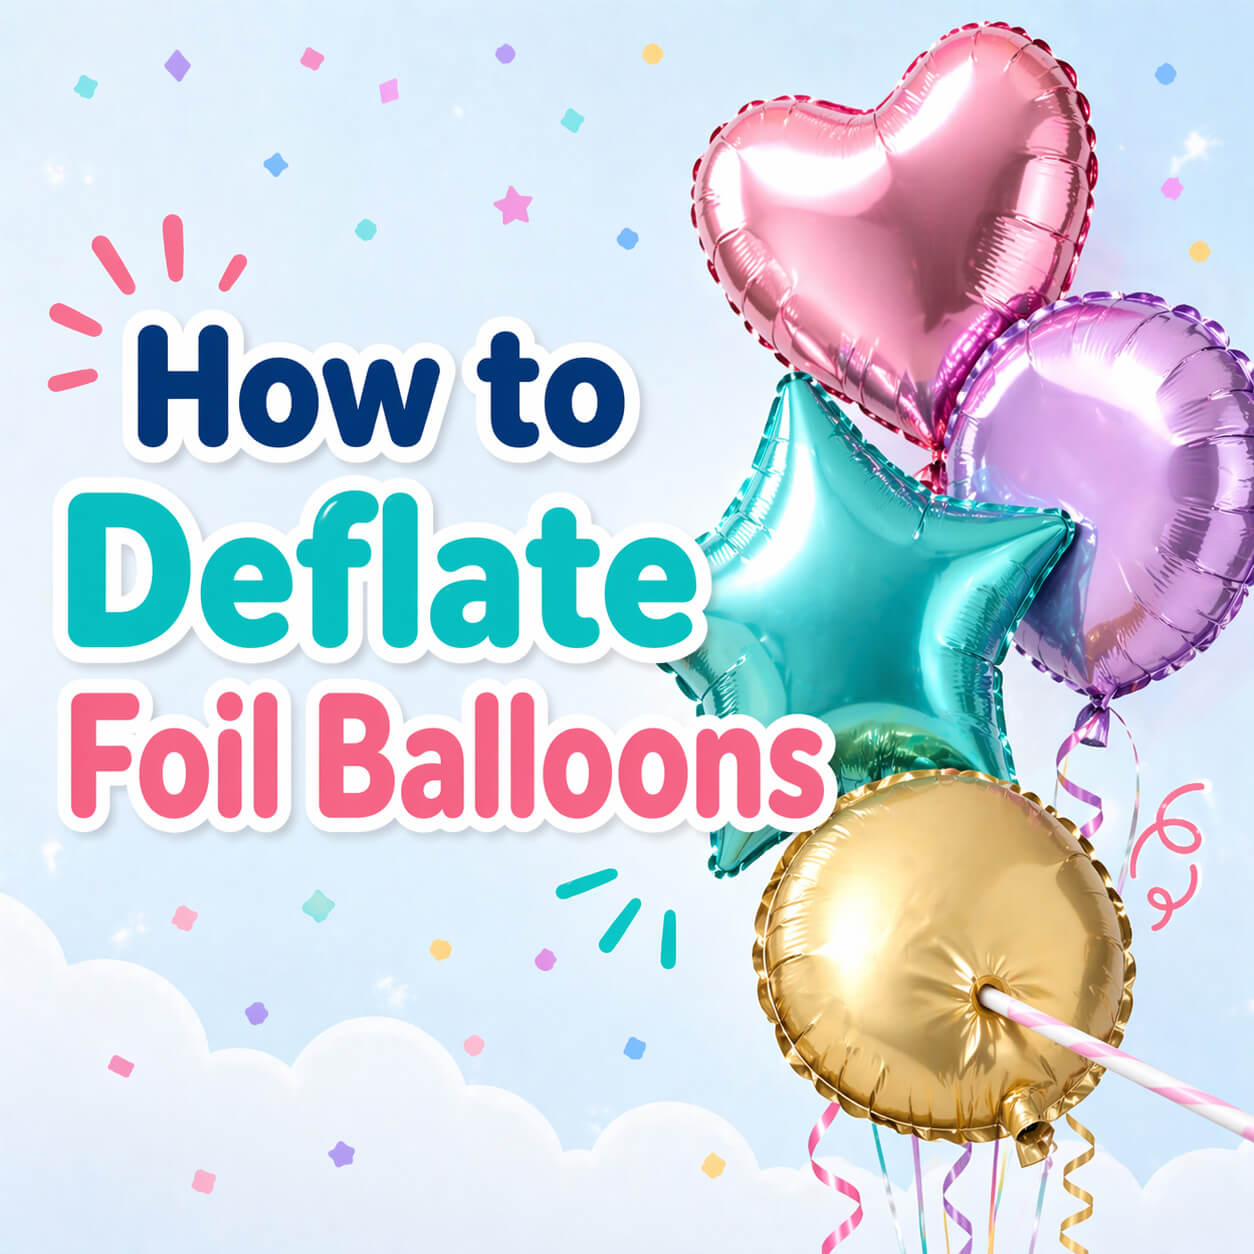
Why People Deflate Foil Balloons Instead of Throwing Them Away
A lot of foil balloons still look almost new after the party is over. That is exactly why people hesitate to toss them. Number balloons, hearts, stars, and round foil balloons often hold shape well enough that it feels wasteful to throw them away after one use, especially when the design still looks clean and the balloon itself was not damaged during the event.
Most of the time, the real question is not whether the balloon can be reused. It is whether the person handling it knows how to let the air out without creasing the material too aggressively or damaging the valve. Once you understand that the valve is the key part of the whole process, the task becomes much less intimidating.
That is also why rushing is what ruins reusable foil balloons more often than the balloon itself being “old.” People pinch, pull, or flatten too aggressively because they want it done in thirty seconds. But foil balloons respond better to slow handling than to force. If you treat them like something you plan to use again, they usually cooperate.
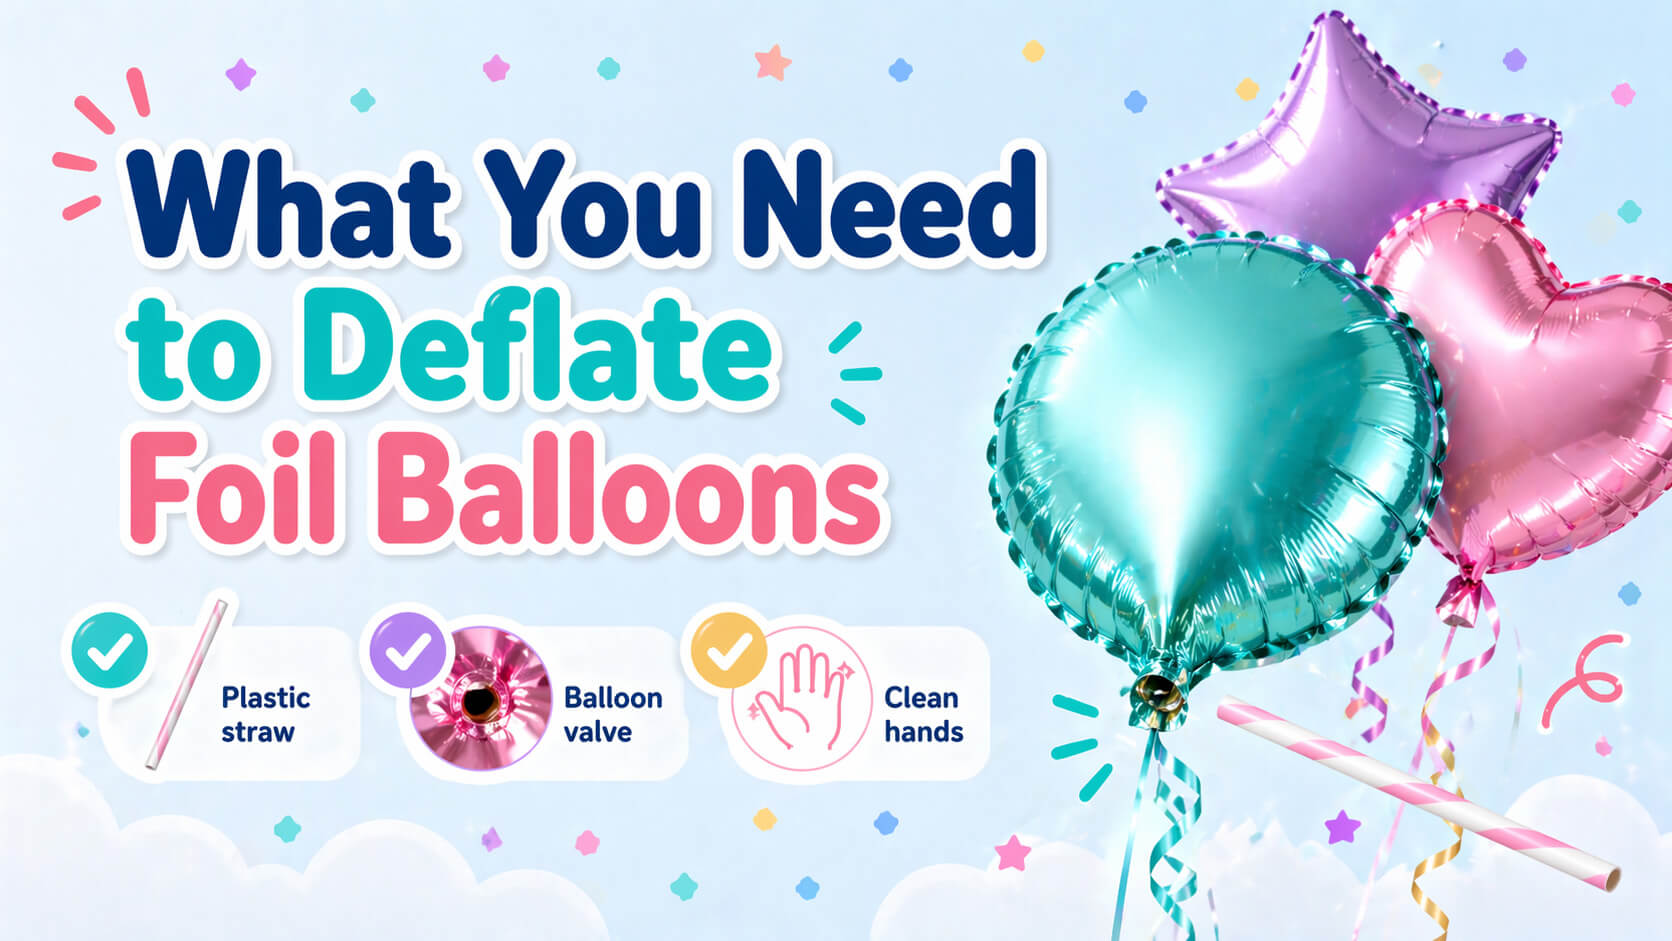
What You Need Before You Start
The setup is simple. You do not need a machine, a special tool kit, or anything dramatic. In most cases, a clean plastic straw is enough. What matters more is that the straw is smooth, narrow enough to slide into the valve, and not sharp enough to damage the inside of the balloon.
It also helps to work on a clean surface with dry hands. Foil balloons wrinkle easily when they are half-empty, and they feel harder to control if you are balancing them in the air while trying to find the valve at the same time. A table, a bed, or a clean floor gives you much more control than trying to do it one-handed.
If the balloon has ribbon, tape, or extra decor attached, it is often worth removing or loosening that first. You want the balloon itself to be the only thing you are managing while the air comes out.
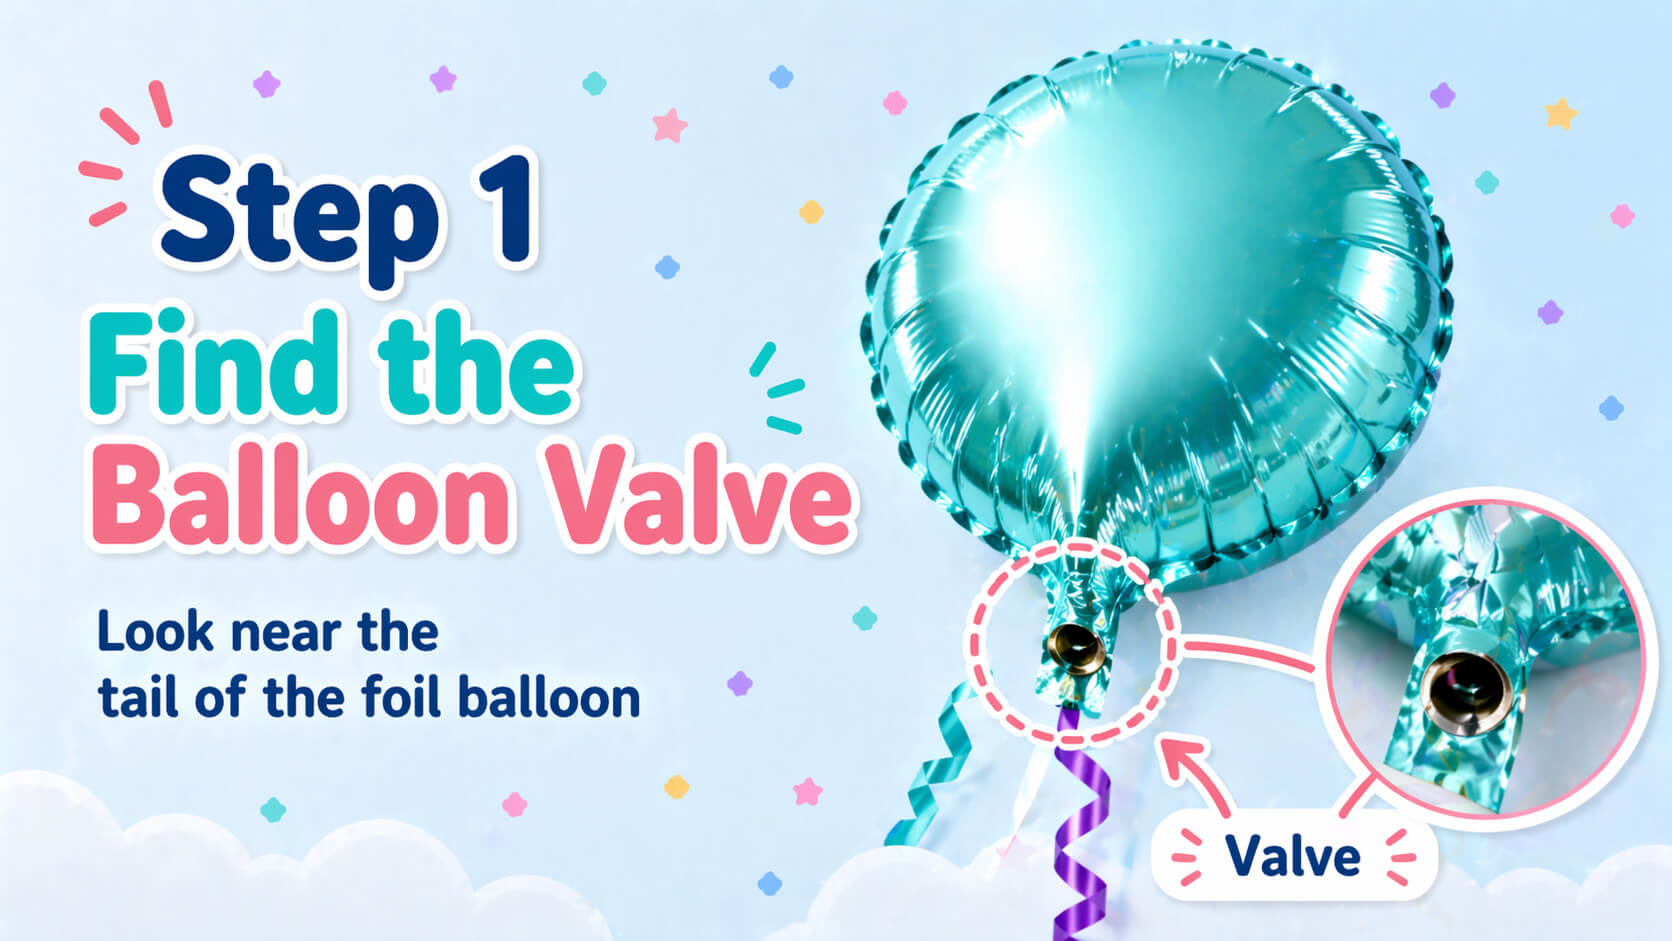
Step 1: Find the Balloon Valve
The valve is usually near the tail of the foil balloon, close to the inflation tab. It may not look dramatic, which is why people miss it. On some balloons it is obvious right away. On others, you need to feel the neck area gently and look for the small channel where the straw can slide in.
If you are working with a larger foil balloon, especially a round or shaped one, do not start by tugging on the tail. The tail is not the same thing as the valve opening. The valve is slightly inside that area, and the job is to guide the straw into that passage instead of forcing the outer edge open.
This is the part where patience matters most. Once you have found the correct spot, the rest becomes much easier. If you have not found it yet, pushing harder will not help. Slow down, look closely, and try to identify the cleanest opening where the straw can enter.
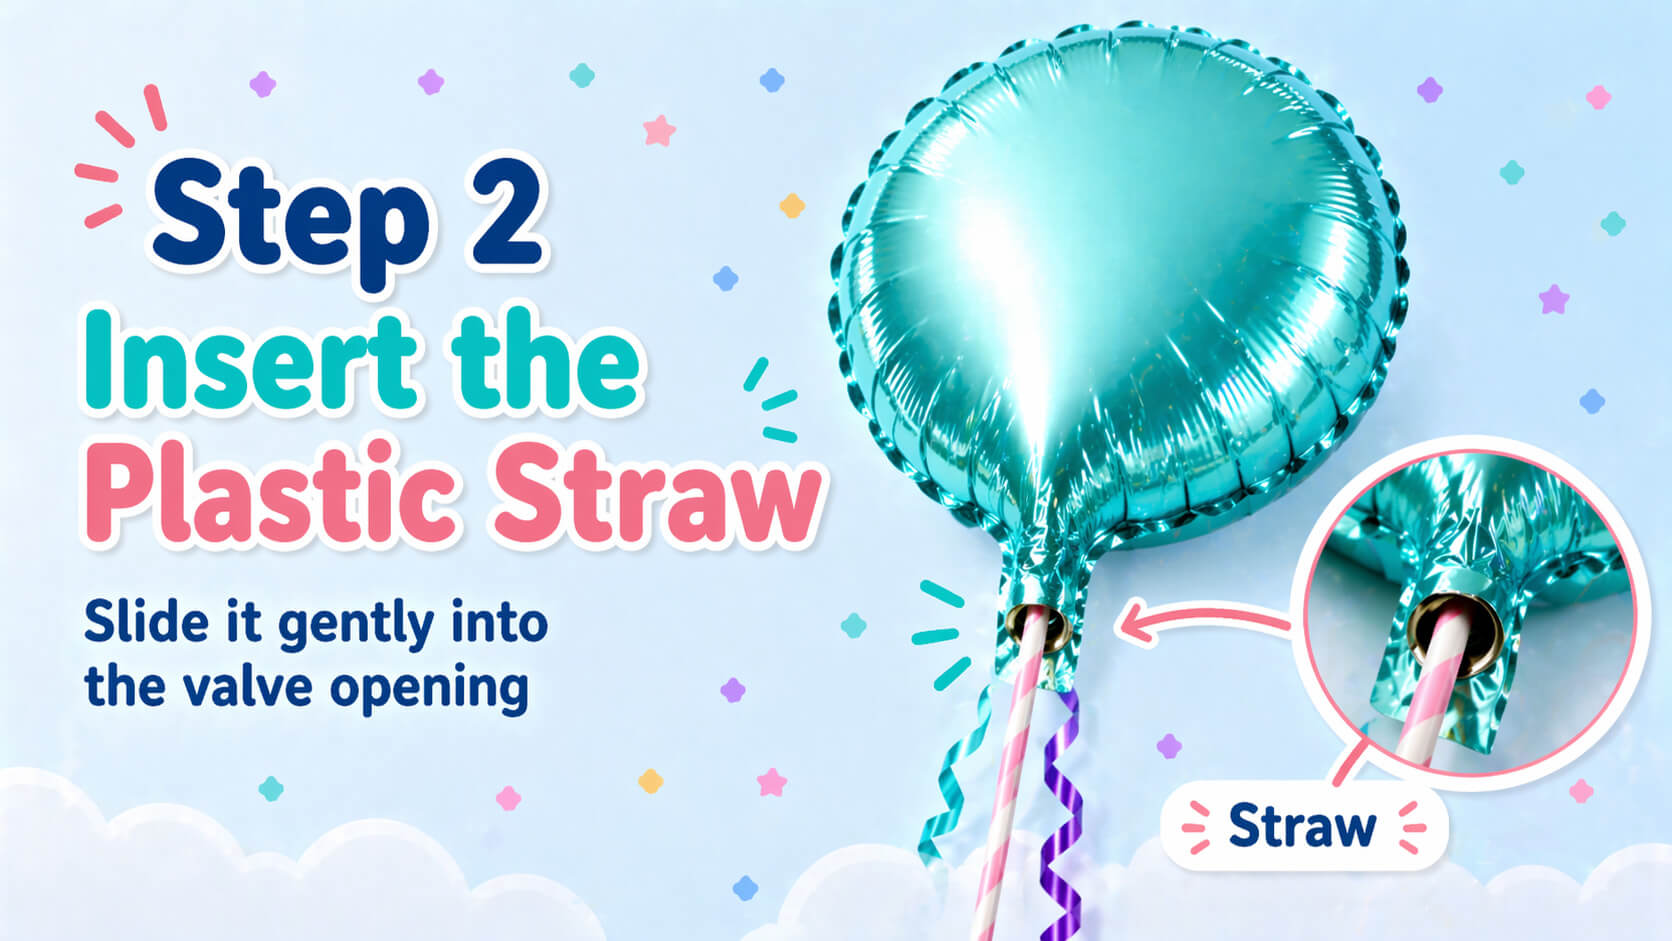
Step 2: Insert the Straw Gently and Release Air Slowly
Once you have the valve, slide the plastic straw in gently. You should not feel like you are puncturing anything. The straw should move through the valve channel with a little resistance, but not with the kind of force that makes you nervous. If it feels wrong, pull back and try the angle again instead of pushing harder.
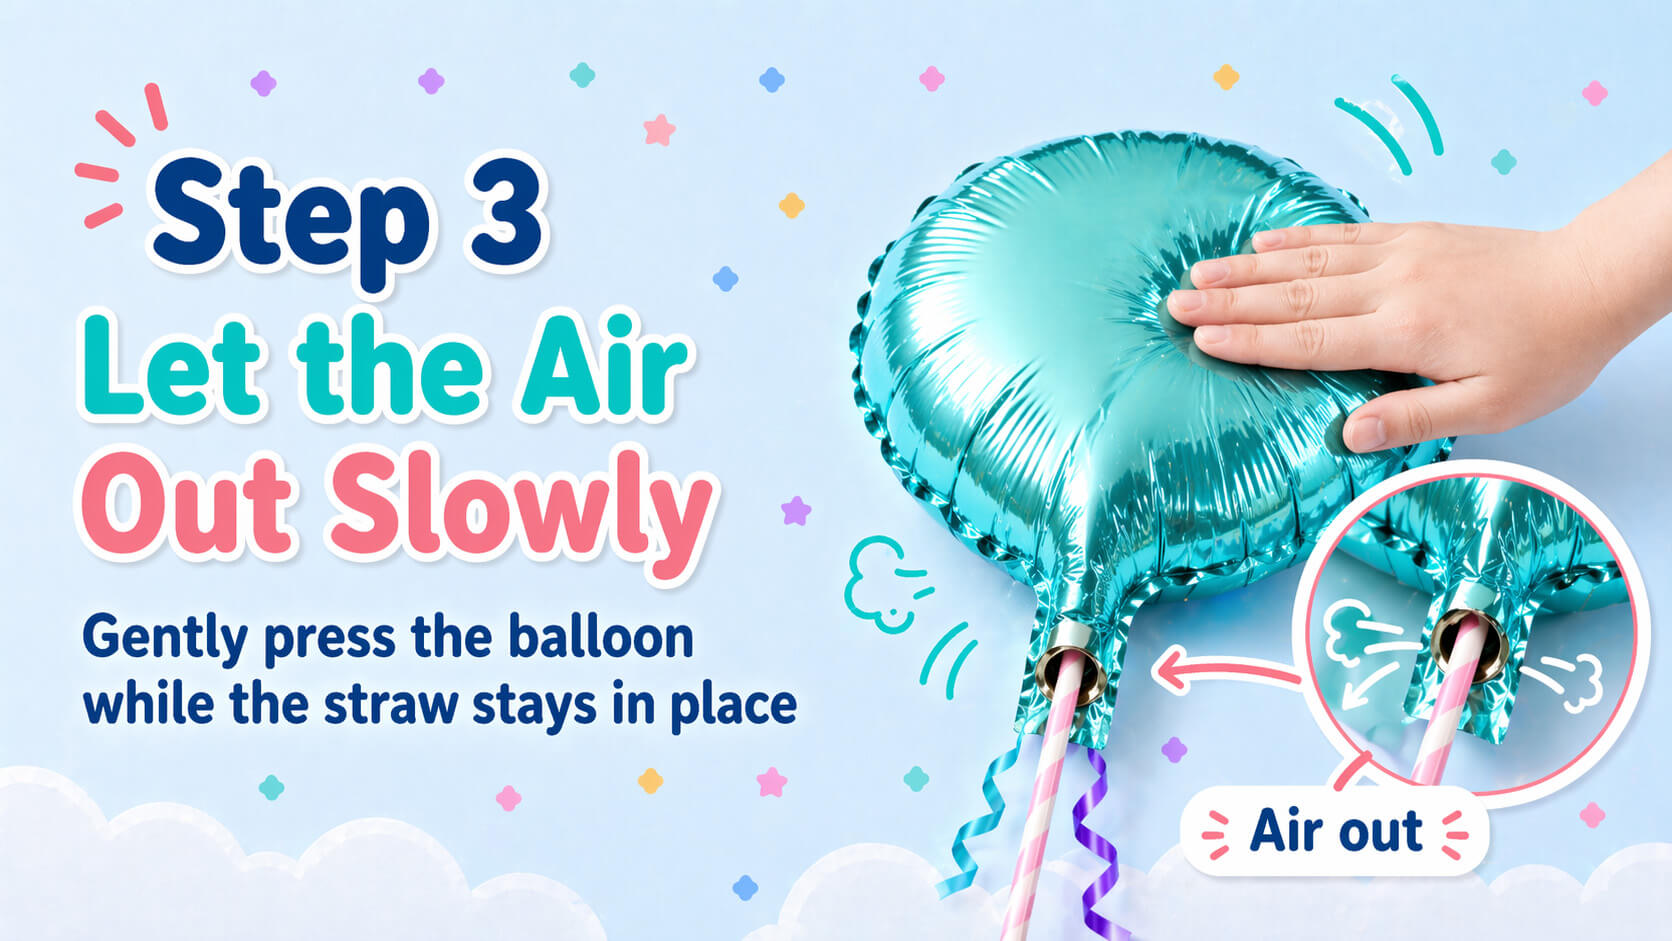
As soon as the straw reaches far enough, the seal inside the balloon opens and the air begins to release. This is the point where people are tempted to press too hard. Try not to. Let the balloon soften gradually. A slow release gives you more control and reduces the chance of ugly creases or sudden stress along the seams.
If the balloon is large, it often helps to use one hand to keep the straw steady and the other hand to support the balloon body. Think of it like guiding the air out, not squeezing the life out of it. Gentle pressure works better than force almost every time.
Step 3: Fold Carefully and Store It for Reuse
Once most of the air is out, flatten the balloon slowly with your hand and keep the folds soft. You are not trying to make it perfectly tiny. You are trying to make it easy to store without turning it into a heavily creased sheet that will look tired when you inflate it again later.
The easiest way to store it is to fold it in broad sections and keep it somewhere clean, dry, and not too hot. A drawer, a storage box, or a flat envelope-style folder can all work well. The main thing is to avoid sharp bends, crushed corners, or anything heavy sitting on top of it for months.
If you reuse balloons often, it helps to keep the ribbon or original packaging information with them. That way, when the next birthday, shower, or surprise setup comes around, you already know what belongs together and which balloons are ready to be inflated again.
And if you decide you would rather mix reused foil pieces with a fresh setup, it is easy to start from the main gift delivery hub or compare live options in balloon delivery and decor pages.
Common Mistakes That Damage Foil Balloons
The most common mistake is treating a foil balloon like a regular latex balloon. People assume the tail is supposed to stretch open, or they try to press all the air out through the wrong part of the neck. That usually leads to bent seams, stress at the tab, or unnecessary damage that could have been avoided.
Another mistake is using something too sharp instead of a smooth straw. If the tool scratches, pokes, or catches on the inside, the balloon may not survive the next inflation. Foil looks sturdy, but the seams and inner valve system still need a gentle touch.
The last big mistake is over-folding the balloon once it is empty. Deep, harsh creases make a reused foil balloon look older faster. You do not need the smallest fold possible. You need a clean, calm fold that keeps the balloon reusable.
Can You Reinflate a Foil Balloon Later?
Usually, yes. That is one of the best things about foil balloons. If the seams are intact and the valve has not been damaged, you can often inflate them again for another celebration. That is why number balloons and larger shape balloons are so often worth saving after birthdays, anniversaries, and milestone setups.
The exact result depends on how the balloon was handled the first time. A balloon that was yanked, crushed, or folded too sharply may still inflate, but it will not always look as smooth. A balloon that was deflated slowly and stored with care usually comes back in much better shape. If you are also trying to judge whether it is worth saving in the first place, it helps to read how long helium balloons last so you know what kind of lifespan is normal for foil versus latex.
That is really the point of learning this process properly. It saves money, reduces waste, and makes it much easier to plan future decor without starting from zero every single time.
The Calm, Safe Way to Think About It
If you remember one thing, let it be this: foil balloons do not need force. They need the right path for the air to come out. Find the valve, use a smooth straw, keep your hands steady, and let the balloon empty at its own pace. That is the difference between a balloon you can reuse and a balloon that gets damaged at the last minute.
Once you do it once or twice, the process stops feeling technical. It just becomes part of cleanup. And honestly, it is one of those small party skills that ends up being surprisingly useful because foil balloons show up at so many birthdays, showers, and milestone celebrations.